In my journey with Home Assistant, ensuring timely notifications has been crucial (to be informed of low battery in sensors or disconnected ZigBee devices). Initially, I opted for Telegram notifications (Home Assistant Telegram integration), as my Home Assistant setup was accessible only within my home network, limiting my options for push notifications.
However, as my system evolved, I sought a solution for remote access and secure push notifications. This led me to configure a free Dynamic DNS (DDNS for FREE with GoDaddy) service with GoDaddy and acquire a free SSL certificate (Get Free SSL certificate for your site ), granting secure access to my Home Assistant from anywhere.
Despite this progress, managing notifications remained cumbersome. When I upgraded my phone, I faced the daunting task of updating numerous automations and scripts to accommodate the change in push-notification destinations.
Determined to streamline this process, I devised a universal notification script. This ingenious solution centralized notification management, sparing me the need to update multiple scripts for every change.
With this universal script in place, adapting to future changes in notification channels or devices became a breeze, marking a significant milestone in my Home Assistant journey.
Universal script creation
the logic of script usage
The central concept revolves around creating two variables, or helpers, for message title and body. These helpers serve as repositories for storing essential information from any automation, facilitating their use in the notification script for subsequent actions.
variables for a message title and body
To create the helpers, navigate to “Settings” -> “Devices & Services” -> “Helpers”. Then, click on the “+ ADD HELPER” button in the bottom right corner, and select “Text”.
Next, add the name “Notification_title”, choose an icon to enhance visibility, and click the “create” button.
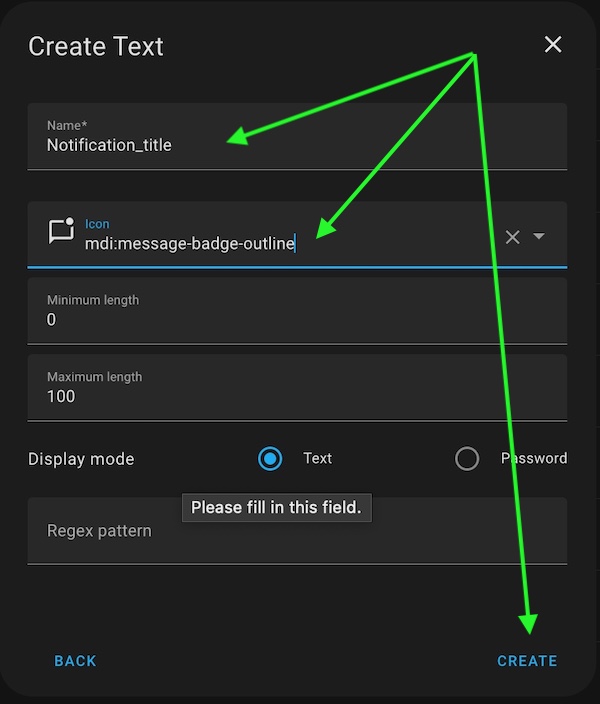
Repeat the same steps to create the helper “Notification_message”.
As the result the two helpers are created.

Notification script creation
To create the notification script go to “Settings” -> “Automation & scenes” -> “Scripts”, click onto “”+ ADD SCRIPT” button in the bottom right corner, and choose “Create a new script”.
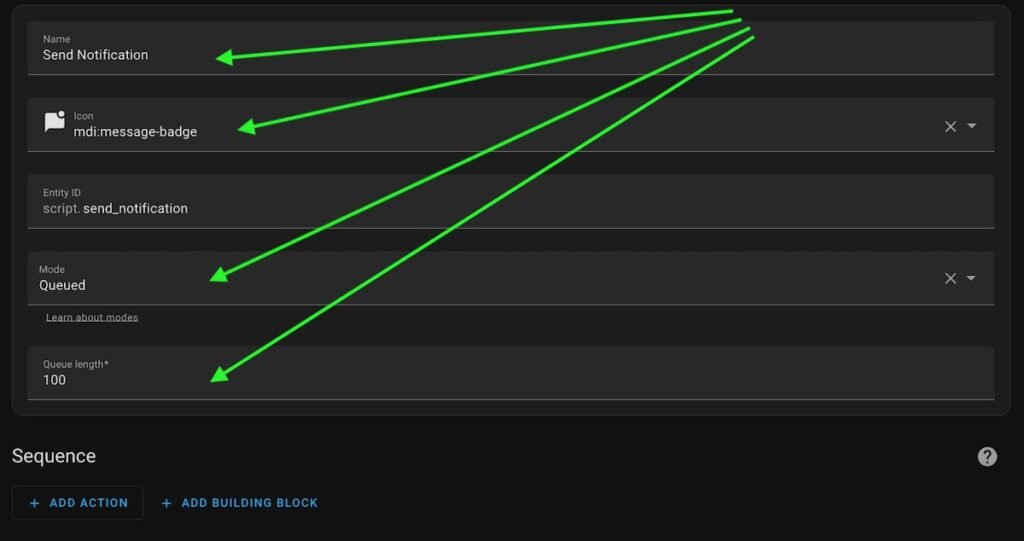
Name your script and choose an icon to make it stand out in the list of scripts.
It’s important to note that this script can be called simultaneously from several automations and other scripts. Therefore, the “Queued” mode is necessary to prevent loss of notifications.
Additionally, consider adjusting the Queue length if you experience issues with notifications being lost.
Next, click “+ ADD ACTION”, type “notify” in the search box and find your mobile phone or another notification channel:
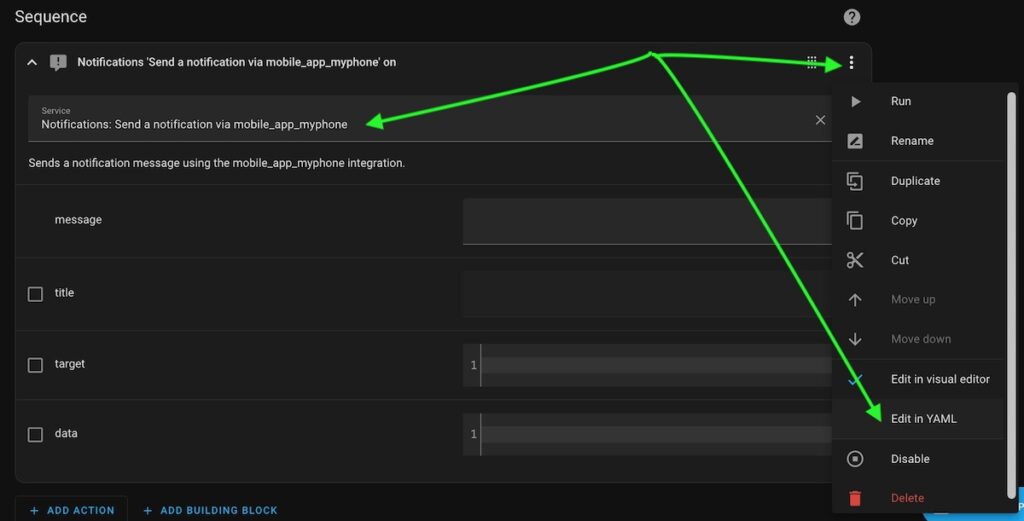
Unfortunately, Home Assistant doesn’t provide possibility to get values of a helper (variable) directly from the UI.
As a result, YAML code is necessary to retrieve values for a notification. So, click onto “triple-dot” menu button of your notification action (under Sequence), choose “Edit in YAML” menu, and use following code:
service: notify.mobile_app_myphone
metadata: {}
data:
  title: "{{states('input_text.notification_title')}} "
  message: "{{states('input_text.notification_message')}} "
Please pay attention to the notification channel name and the names of your helpers, as they may differ from those provided in the example above.
Now, save your script and follow steps in the next chapter to use it.
Notification script usage
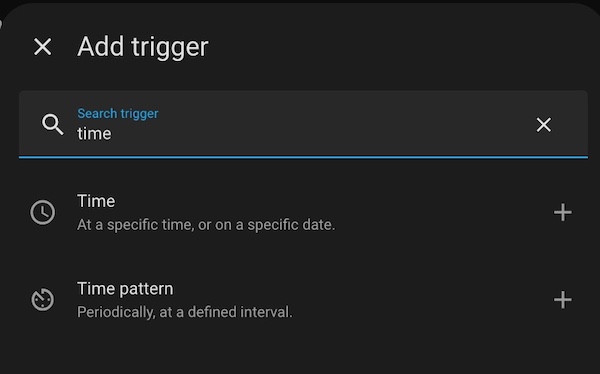
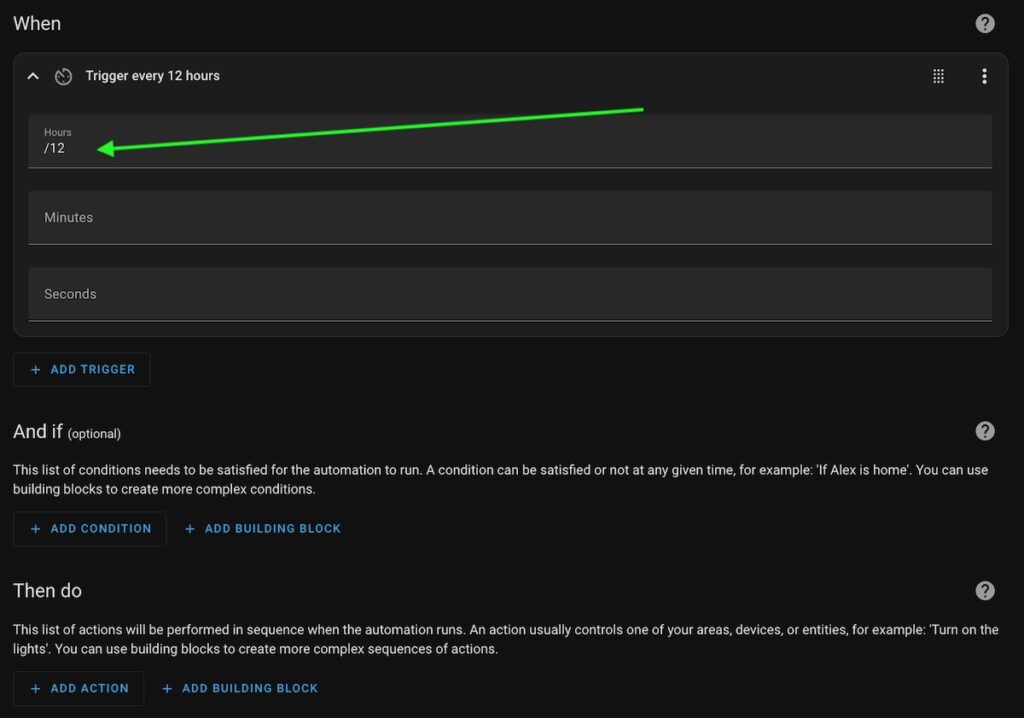
Configure your trigger to call the action every 12 hours:
Please click “+ADD CONDITION” to check if a new version of Home Assistant is available, chose “template” type of condition and add following code:
{{is_state('update.home_assistant_core_update','on')}}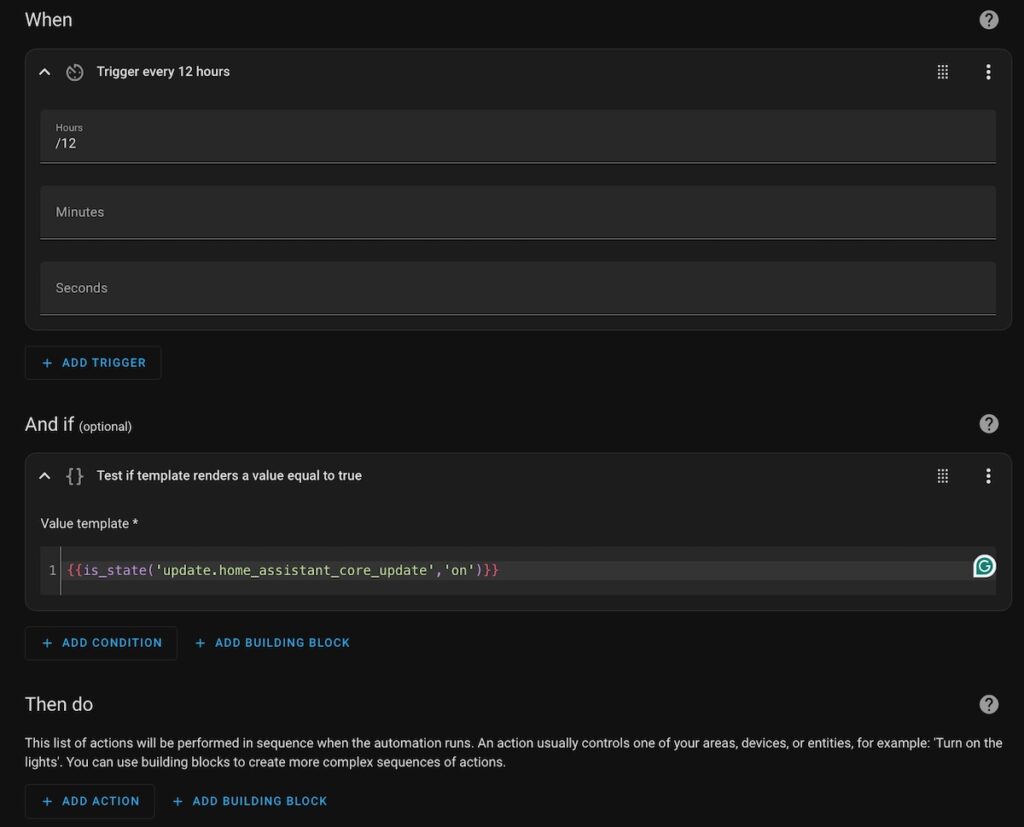
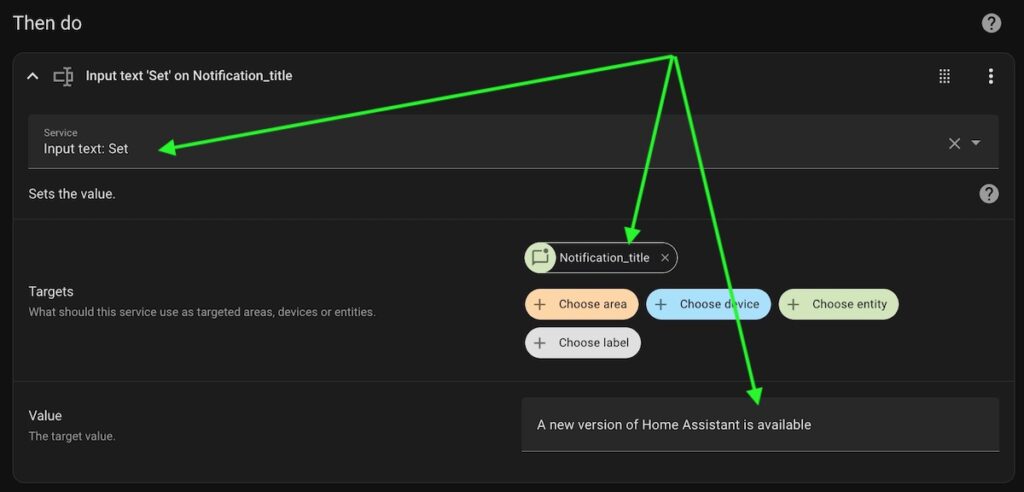
Next, click “+ ADD ACTION” and chose “Input text: Set”, click “+ Choose Entity”, find your “Notification_title” helper and add value “A new version of Home Assistant is available”
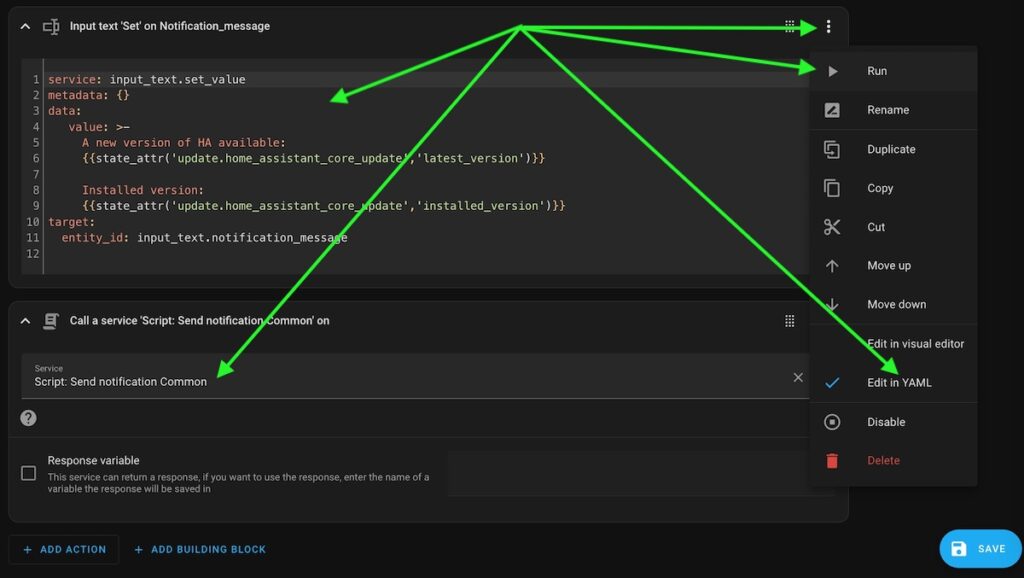
It would be great to see which version is installed and which one is issued. So, click “+ ADD ACTION” again and chose “Input text: Set”, click “+ Choose Entity”, find your “Notification_message” helper. Unfortunately, there is no way to set value of a helper from another entity, so please click “tripple-dot” menu of the action and chose adit in YAML and add following code:
service: input_text.set_value
metadata: {}
data:
   value: >-
     A new version of HA available:
     {{state_attr('update.home_assistant_core_update','latest_version')}}

     Installed version:
     {{state_attr('update.home_assistant_core_update','installed_version')}}
target:
  entity_id: input_text.notification_message